
A Picon (probably a word creation from Program and Icon) is a graphic element in the OSD which represents the channel logo of a TV/Radio program. The file name of the picon is based on the channel reference of the corresponding program.
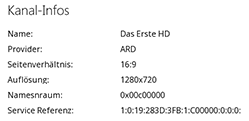
The channel reference is displayed e.g. with an active program on the box via Menu->Information. Only the file suffix (*.png) is then attached to the channel reference, which must have a colour depth of 8 or 32 bit. If these conditions are fulfilled, we now need the following conditions so that the picons are also displayed on the box.
- Storage location depends on the skin used
- Skin must have assigned Picons a place in the OSD
- Standard paths /usr/share/enigma2/picon and /media/usb/picon

In order to manage your picons with dreamboxEDIT, you need to know that any picons that may be present on the box cannot be downloaded directly with dreamboxEDIT. If you want to check these files for completeness or currency, you must download them to your computer using an FTP client. You then add the path where you have saved the picons in the profile in the options under “Local path for picons”.

Dieser Pfad wird mit dem Profil abgespeichert, so dass ihr für jeden Profileintrag einen eigenen Pfad hinterlegen könnt. Nun muss dreamboxEDIT noch wissen wo die geänderten Picons auf der Box hinterlegen soll. Dazu wählt ihr in Optionen->Profile->Pfad für Picons auf der Box, den richtigen Pfad aus. Wie oben beschrieben ist das abhängig von Eurer Box und dem Skin, habt ihr also eine Box mit genug Flashspeicher (DM7020HD und alle v2 Boxen) könnt ihr den Standardpfad /usr/share/enigma2/picon benutzen, ansonsten ist es zu empfehlen die Picons auf einen externen Datenträger (keine HDD, z.B. /media/usb/picon) auszulagern. Ein Auslagern auf einem USB Stick ist natürlich nur möglich wenn er richtig im Gerätemanager der Box nach o.g. Pfad gemounted wurde. Nun müssen wir noch einstellen wie dreamboxEDIT mit den Picons in der Benutzung umgehen soll. Dazu öffnen wir wieder die Optionen und wechseln in das Register GUI.
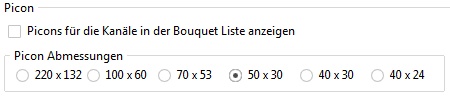
A check mark in the selection box activates the display, and with “Picon Dimensions” we set the size of the picons displayed in TV User Bouquet Details, i.e., the middle window. Here, it is important to pay attention to the native size of the picons to ensure undistorted display. Example: With a native dimension of 100×60, it makes sense to activate 100×60 or 50×30 here.
After saving the settings, we load the last saved settings, because this is when the picons are displayed for the first time in dreamboxEDIT to the left of the channels in our bouquet. Now we can check whether all picons have been assigned to a channel. If something is wrong here, we right-click on a channel and select “Assign channel picon,” which opens a selection window where we have to navigate to the local path of the picons once. There we can assign any picon to this channel. Other options in the context menu that has just been opened would be to delete the link to the current picon or to copy the channel reference to the Windows clipboard in order to search for it in the file folder.

If you find a new package of your favorite picons online, it is always advisable to overwrite the entire contents of your local picon folder, as you can assume that this package contains the latest picons based on the channel reference.