
Manage Picons
A picon (from "Program" + "Icon") is a graphical element in the OSD that displays the channel logo of a TV or radio programme. The filename is based on the channel reference of the corresponding service.
Requirements
- File format:
*.png - Colour depth: 8 or 32 bit
- Storage location depends on the installed skin
- The skin must allocate a space for picons in the OSD
- Default paths:
/usr/share/enigma2/piconand/media/usb/picon
Configuration in dreamboxEDIT
Local Path
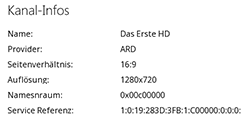
Add the path where you have stored your picons in the profile options under Local path for picons.

Target Path on the Box
Select the correct path in Options → Profiles → Path for picons on the box:
- Boxes with sufficient flash storage:
/usr/share/enigma2/picon - Alternative (external storage):
/media/usb/picon

GUI Settings
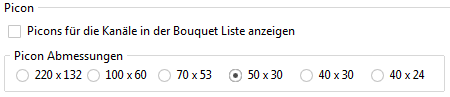
- Enable picon display by checking the checkbox
- Set the Picon dimensions – respect the native size of your picons (e.g. 100×60 or 50×30)
Managing and Assigning Picons
After saving the settings, picons are displayed in dreamboxEDIT to the left of the channel names. To manually assign a picon:
- Right-click on a channel
- Select "Assign channel picon"
- Navigate to your local picon folder
Additional options: delete the assignment or copy the channel reference.
Updating Picons
When you find a new picon pack online, it is always recommended to overwrite the entire contents of the local picon folder with the new package.